Thursday, November 6, 2008

How to get the best from your black and white conversion

Hi everybody, this time I'm going to show you how you can get the best result from your black and white conversion using Channel mixer and hue/saturation.


_LEE0807
Before
bw
After

1.After you open you image in photoshop, go to layer>New adjustment layer>hue/saturation. Set the saturation to between +50 to +100 then OK
hue saturation

2. Go to Layer>New adjustment layer>Channel mixer. change to Black & White by checking the monochrome check box, then adjust the Red to +45 Green +32 Blue +32 then OK.

Channel mixer b&w 45 32 32

3. Go to Layers palate which located on your below right of your screen and Double click on the half black and half white round shape next to the eye ball on the hue/saturation layer. That will open up the hue/saturation you've open earlier.

layer

4. By using the saturation slider(Red arrow shown below), you can slide the slider to left(-) and right(+) and see the changes of your image until the result you like then click OK.

hue saturation slider

Finally after you satisfied with the result, you now flatten the images by simply go to Layer>flatten images. After that you may save as into the folder you like. Make sure the file type selected to jpeg when you save the image.

I hope this help have a good day!
Wednesday, September 3, 2008

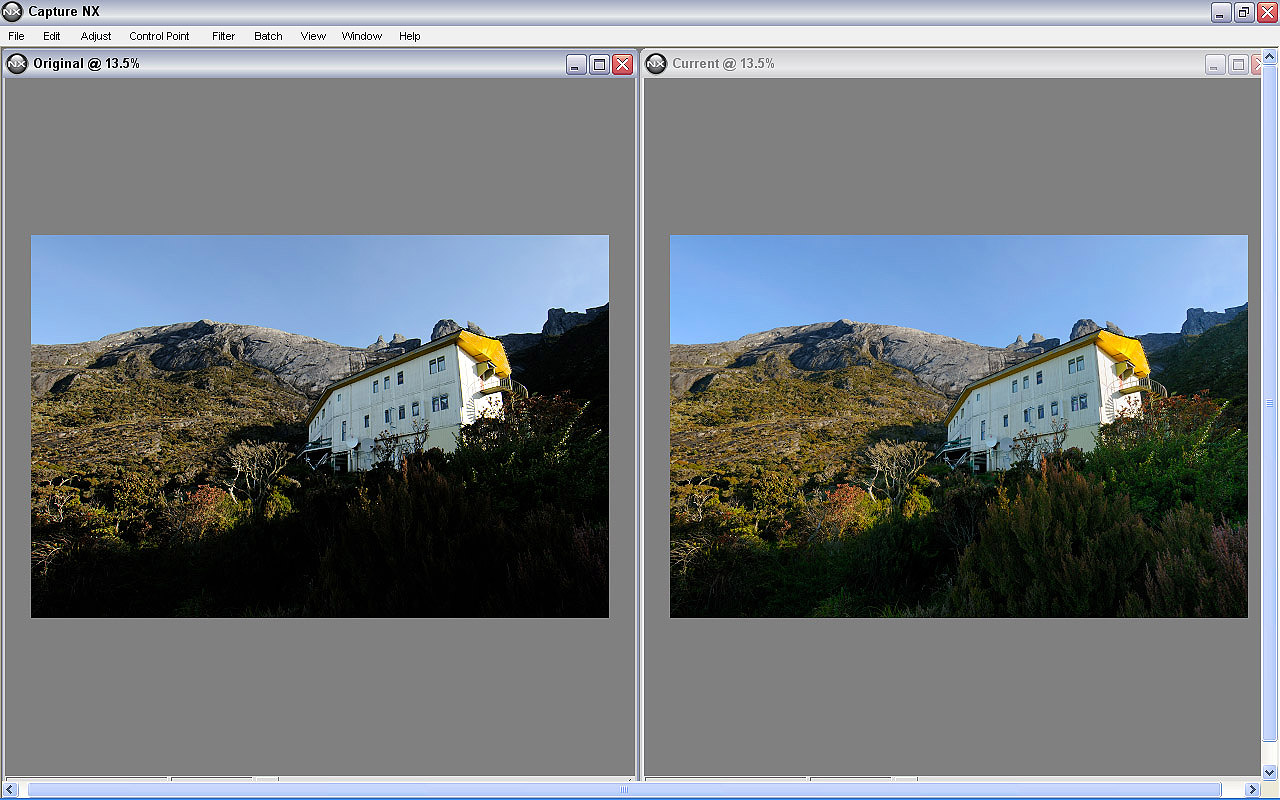
Capture NX

Capture nx compare before & after
before and after

After been using several photo editing and raw converter. I still preferred the capture nx to do my raw conversion of my images. The control point that capture nx has are very good indeed. The capture nx has better color preservation compare the adobe photoshop cs3 raw 4.4. If you are using Nikon camera and still shooting jpeg, I suggest you to start shooting in nef or raw if you wanna get the best quality out of your camera. Get yourself a copy of the Capture NX software. Its comes in bundle if you buy the nikon D300. I'm not sure with the new D90 whether the Capture NX comes with it. The capture nx also available in some selected camera shop.

Sunday, August 3, 2008

How to make border on image using photoshop

This is my 1st video tutorial about using photoshop. I did try my best and I hope you can understand the video.

Wednesday, July 30, 2008

Adobe Photoshop Lightroom

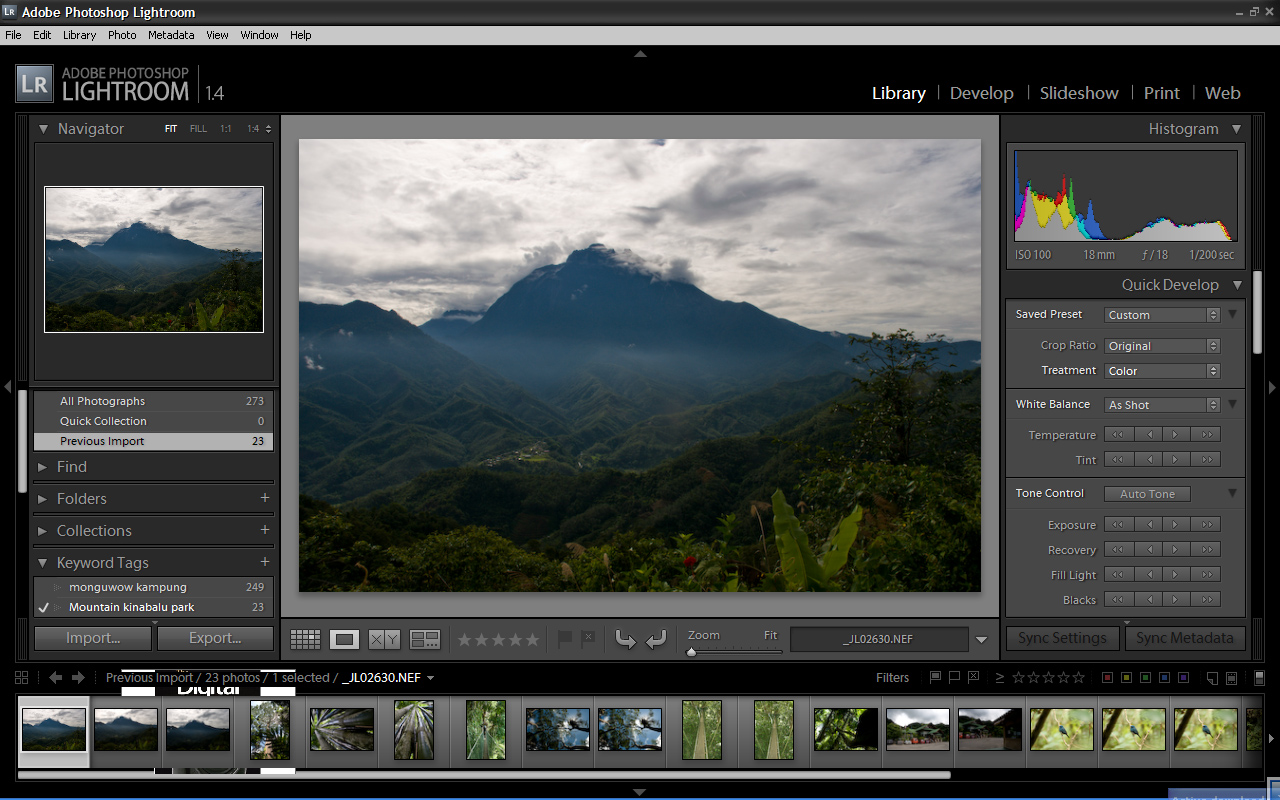
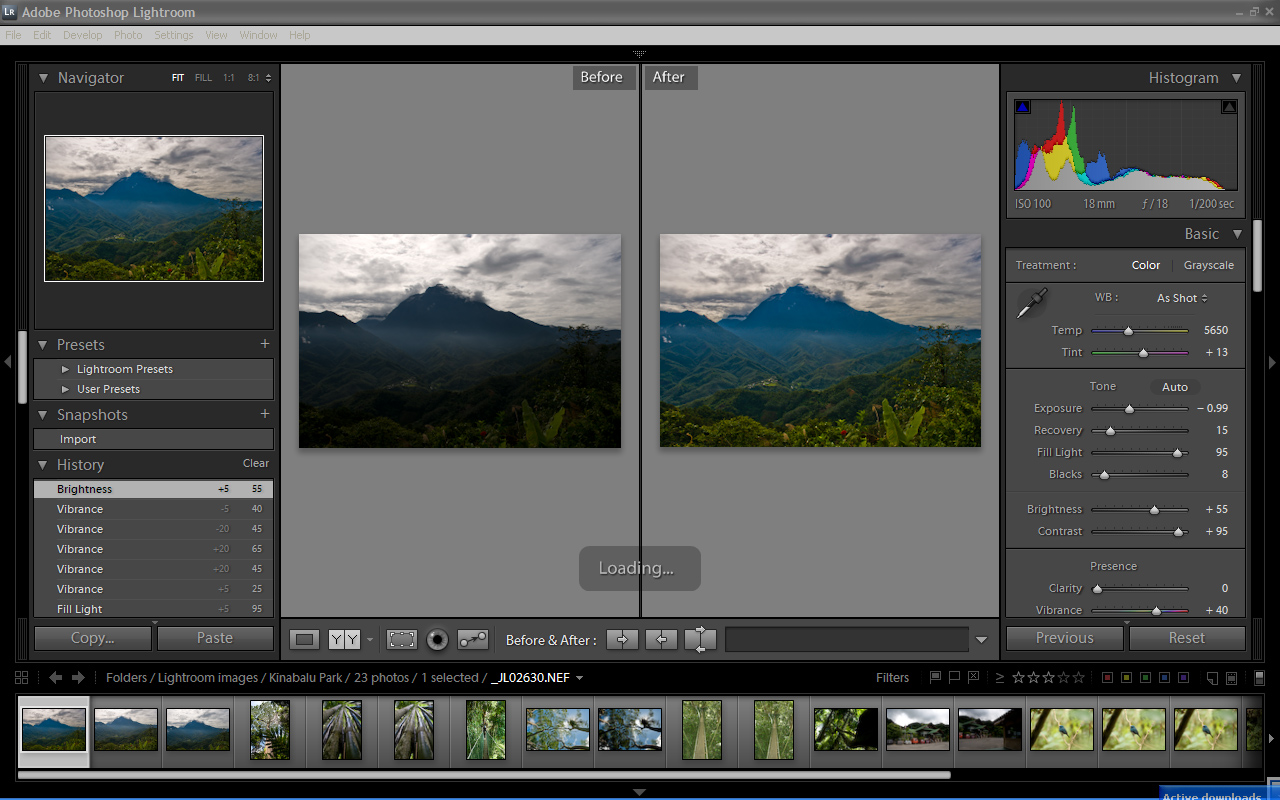
You may heard or even seen lightroom from someone but never use it. For this time of tutorial I'm gonna explain just briefly how does photoshop lightroom works. May be some of you have used adobe bridge before managing your images, adobe lightroom is a similar thing to bridge except it has more control in developing you images before go into photoshop.

Click images for large view
Lightroom screen shot


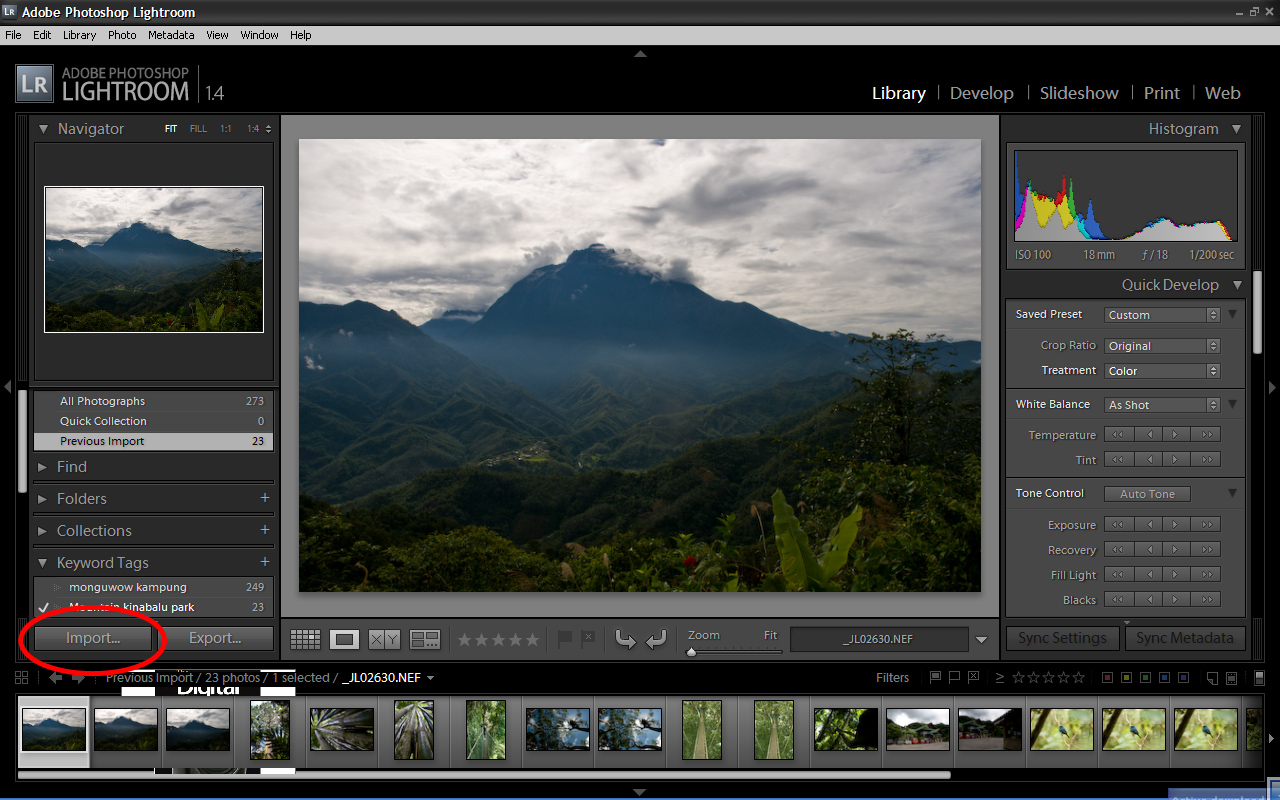
1. Your images that you had in your camera need to be copy to your disk or computer. with lightroom, you can copy your images to your computer and had it applied with certain setting like keywording or meta data setting. to begin with.. you just click import to copy all your images from the camera. You can set the destination folder where you want it to be placed.

Lightroom screen shot import


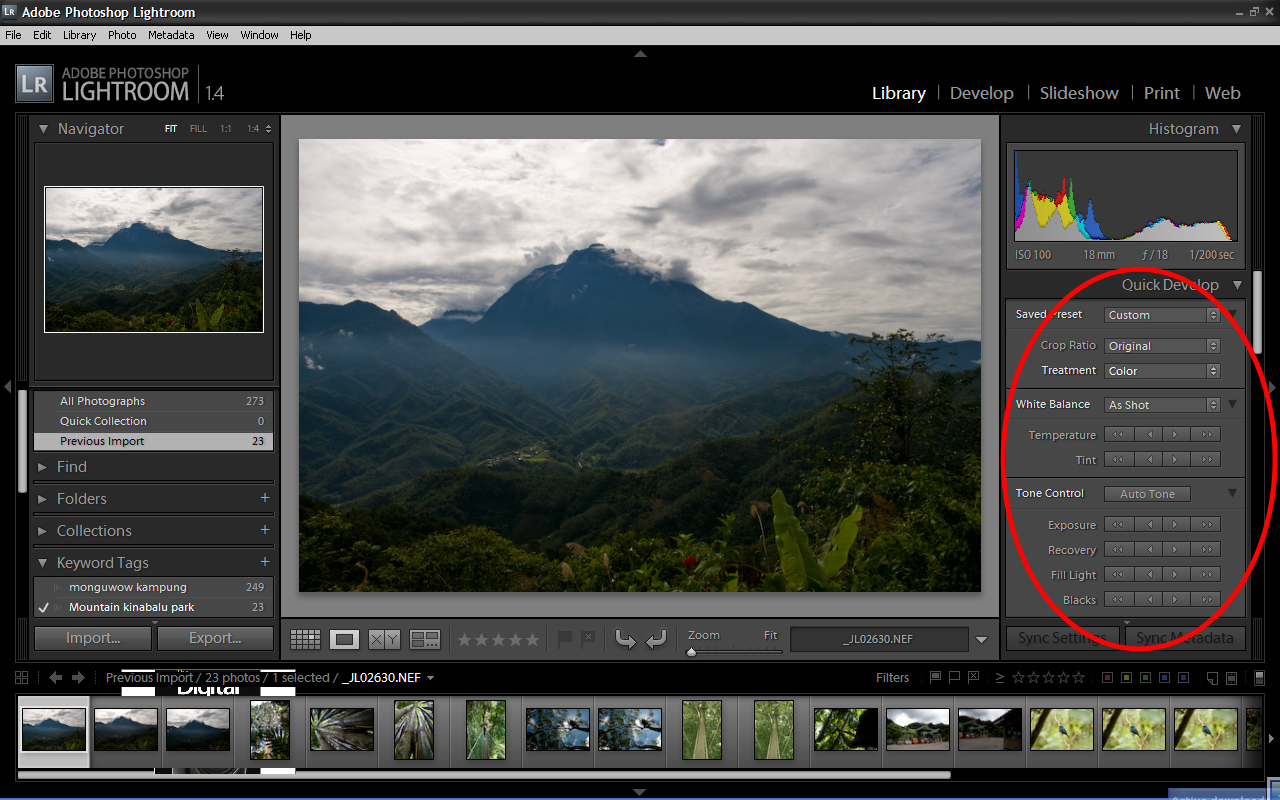
2. Once you had your images copied, now you can start doing the processing of your images. The good thing about lightroom is you had more control adjusting you images which you can find the tools from the right side. You can adjust the exposure, recovering the detail on the highlight, fill light, color adjustment and the metadata.

Lightroom screen shot control


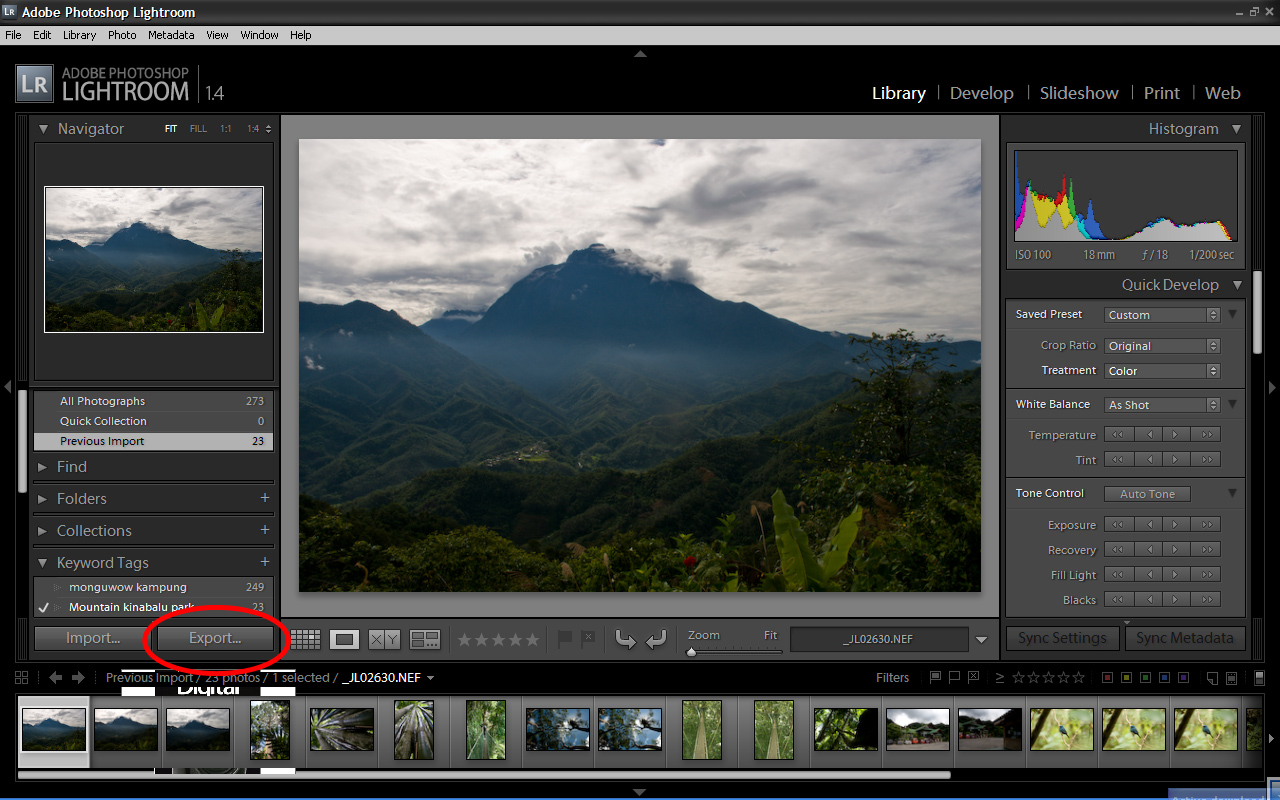
3. After you done adjustment on your images and ready to be save to another folder, you just click the export button and saved it in a folder you wanted to store. You can set it save as jpeg or tiff if you want to do more editing in photoshop cs3.

Lightroom screen shot export


Lightroom screen shot2

Well that is just a basic explanation about how adobe lightroom works. If you have any more question you can add it in comment. I will try to answer it limited to only what I know. Cheers!


Monday, July 28, 2008

Back for good

Hey hey! it been very quiet with this blog for quite sometimes. This blog will be active again, soon will be more post about photography tutorial. I will try to make a post any photography tutorial may be once or twice a week. just keep visiting. Cheers!
Lance

Friday, August 3, 2007

World In Focus Contest


Upload your best travel photo in the photo contest "World in Focus". Check out from it website, click image above to view. Quick! Deadline is very soon..

Saturday, July 7, 2007

How To Capture Moon Shoot

To answer Davelynne question on how to capture moon. Over here I will explain a little bit about it. To capture moon, it is always very tricky because of the bright moon surrounded by darkness. So this will end up a shot where the moon is over expose and you loose the detail of the moon or too bright.Now in order for you to get the detail on the moon is 1st you need to use a zoom lens, ranging between 300mm to 600mm or more. For this shot that I have post in here I use 600mm to capture it. For me to get the detail of the moon I took roughly 6 shots using different exposure setting. In you camera, you have the EV +/- setting where you can adjust the exposure compensation either you want it under or over expose.Down here I put the example of the shot and setting I used to get the moon shots. Usually it is very difficult to get the right exposure but
it a matter of keep trying and trying to get the right exposure using different setting. If you are using a digital SLR then it won't cost you anything to keep shooting. I hope this post helps.
You can post any questions in here about photography and I will try my best to get you an answer.
::Click image for large view::